The Home Build Process
If you’re visiting from my Instagram account, then you know we’re sharing our complete journey to the new home. If you’ve missed an episode, click here to catch up. This particular journey entry ties to the episode no 2. Click here to view the full video.
We’re building a new home and sharing our build process. If you’re considering building, we hope you find this information valuable.
After finding our community and builder of choice, we visited the sales office, got a tour of the model, saw a couple of potential lots, and visited a home that was currently currently under construction.
Step One. Purchase Agreement
A couple of days later, we picked our lot, completed a purchase agreement and submitted our deposit.
Pro tip: Use a realtor. The contract folks, the lenders, the title company and the sales counselor all work for the builder. So even in build situations, it’s important to have a realtor by your side who’s going to advocate for YOU and look out for your best interests.
If you’re looking for a realtor in the DC/MD area who has intimate knowledge of this process, call me.
Step Two. FSC (Final Structural Conference)
The FSC is where you lock down the structure of your house with the sales office. There are no changes allowed to the structure of the home after this meeting so this was a pretty important meeting.
Pro Tip: Prioritize structural upgrades over finishes. Finishes like cabinets, tiling, countertops, etc. can be upgraded in the future, while structural changes like room extensions, windows and ceiling heights are much more expensive and sometimes impossible. After determining your structural needs, add in your finishes with what’s left in your budget.
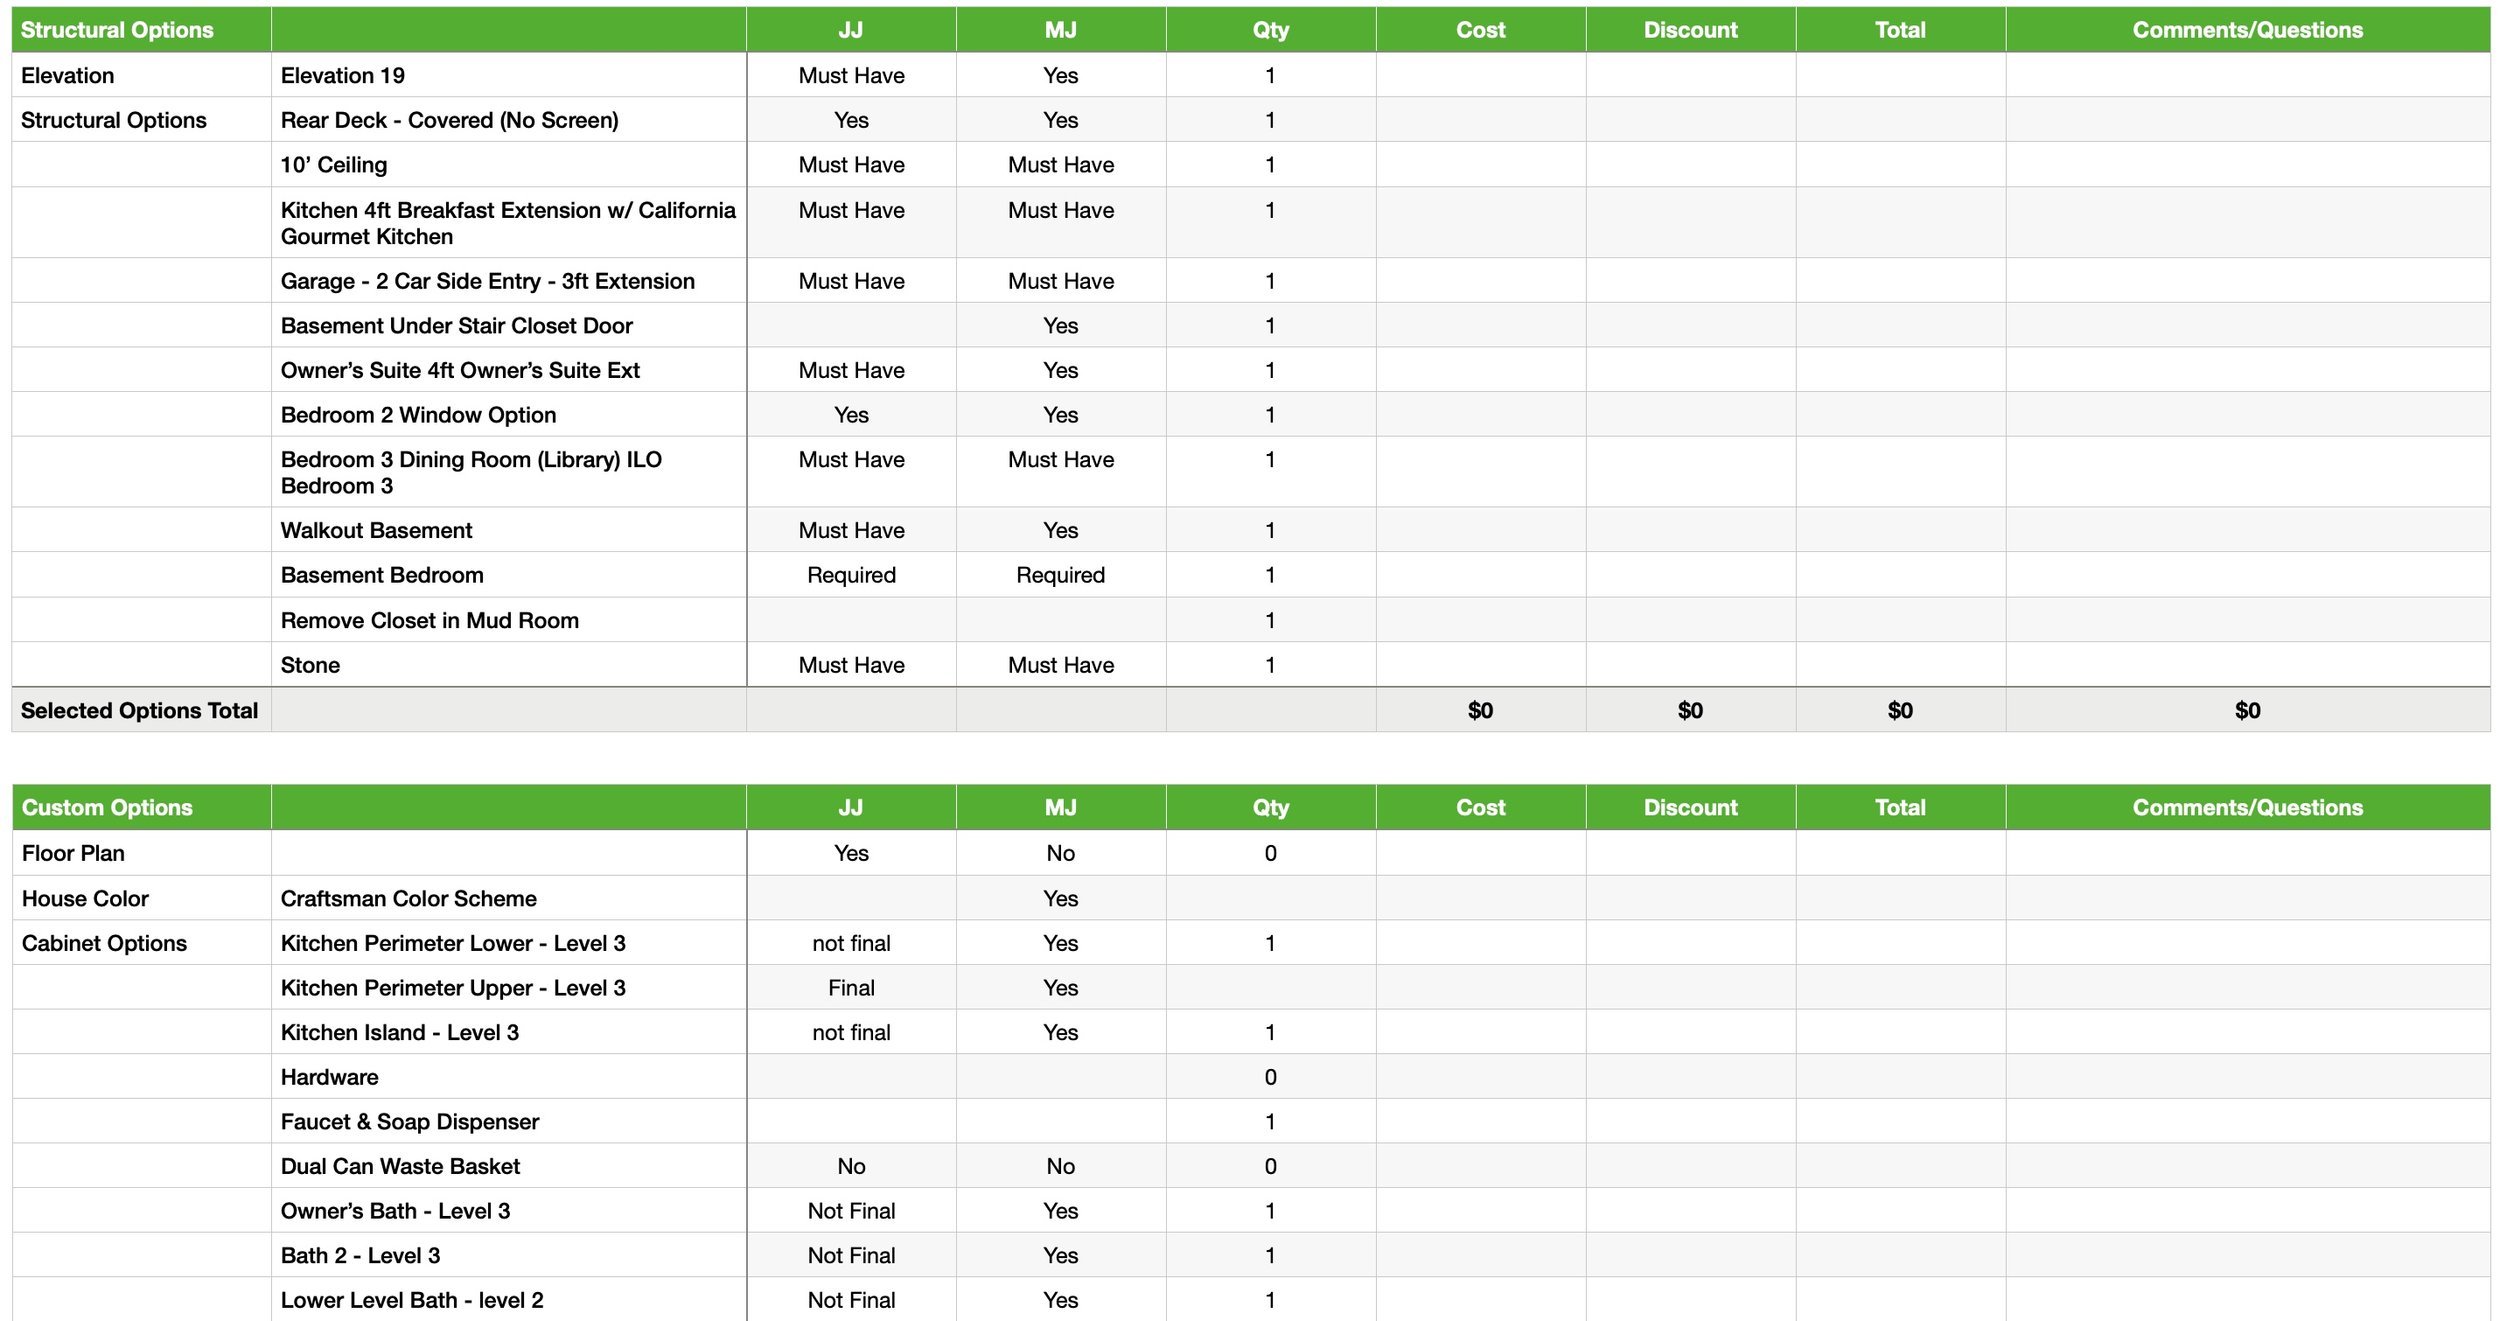
After signing our purchase agreement, we spent the next 2 weeks before our FSC, pouring over the details and structure of the house. We did a lot of soul searching to prioritize options and determine our wants versus needs. My wife loves building spreadsheets, so she created a massive collaborative spreadsheet full of notes, questions and pricing to assist in the process.
This part was pretty intense so if you’re considering building a home in the future, here are a few tips.
Pro tip:
1. Establish and stick to the budget. Your lender can help you with this.
2. Build your house according to how you live, not according to how you MIGHT live.
3. Separate your must haves from your nice to haves.
4. Research your appliance choices by model number. Don’t just go by how they look.
5. And finally, STICK TO THE BUDGET.
Step Three: Low Voltage Appointment
Next, we had a virtual low voltage appointment, which is where we met with the security/home automation guy to finalize the security options, network cabling, etc.
Pro tip: Keep your budget in mind because it all adds up very quickly. Electrical sockets, media outlets, Audio/Video options, Networking cables, and security systems are very important items to think through, but chances are that you won’t actually need most of them.
Step Four. Design Studio Virtual Appointment
The purpose of this appointment was to let the design center know what we’re thinking in terms of the design options in our home, so they could prepare for our in person visit and physically lay out all the options and samples for us. That was another intense meeting, because you have 2 hours over a zoom call to do your best at picking all your design options.
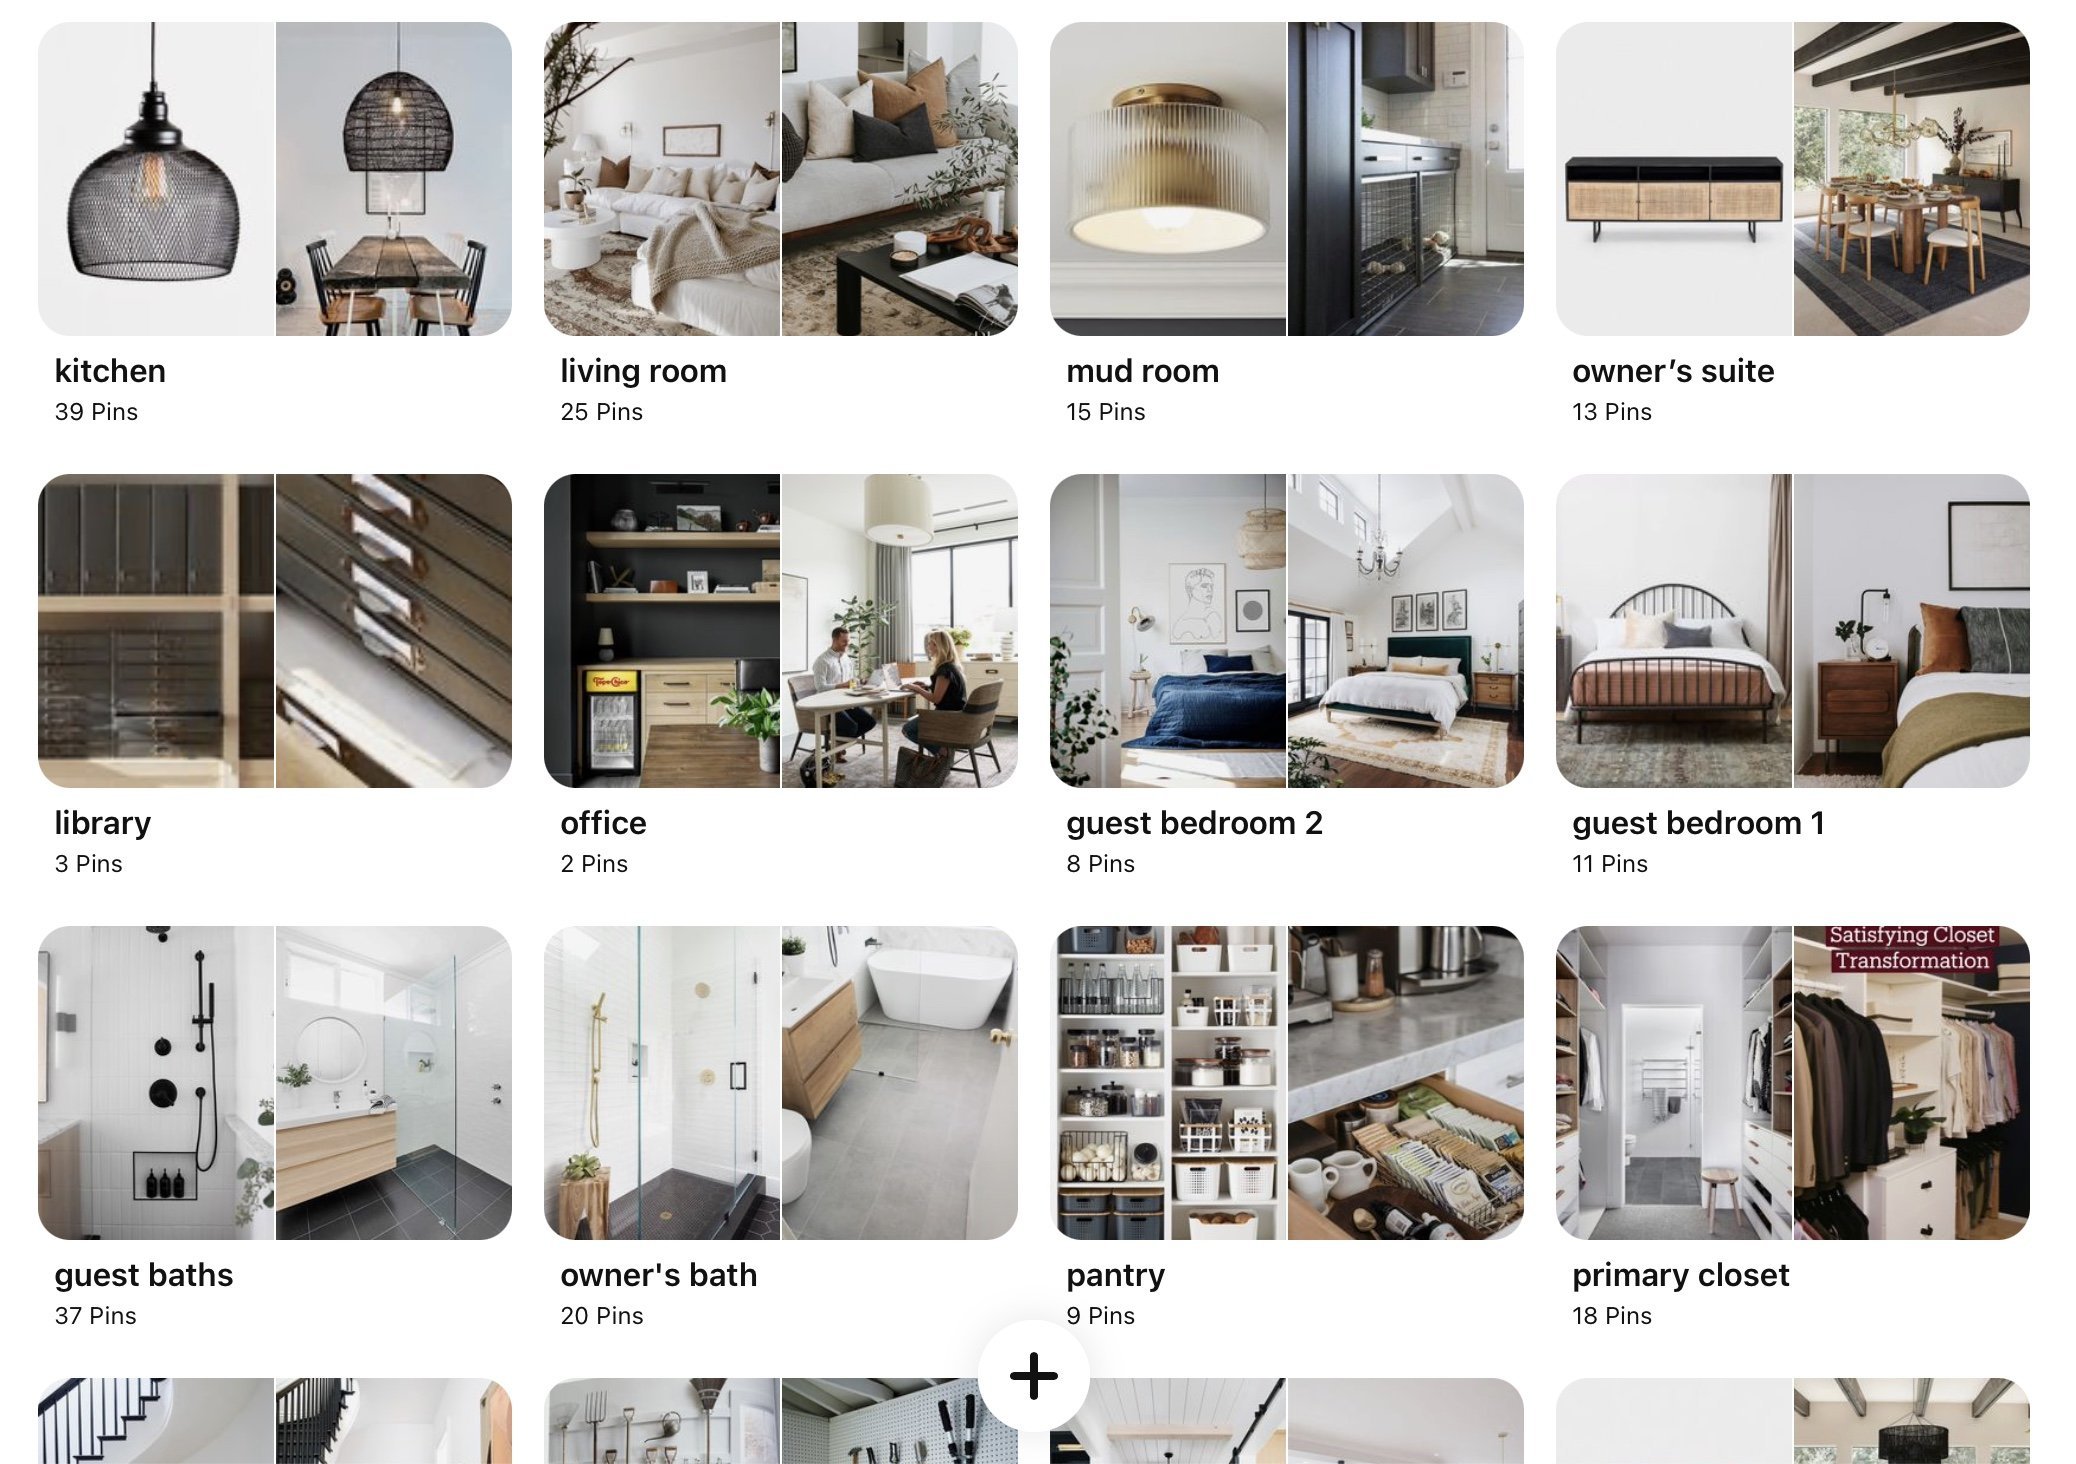
Pro tip: Pinterest your life away. Nail everything down ahead of time using a Pinterest board. Find what you like and save all of your inspiration photos so that you have references for what you’d like to do in your home.
Step Five. FSA (Finish Selection Addendum)
Next, we had our 1 hour in-person design meeting. When we first heard we only had 1 hour to see everything and make final decisions, we were STRESSED (mostly because of unexpected traffic causing us to be late). The saving grace was that we prepared and studied the Pinterest boards and spreadsheet, so we got through it pretty easily.
Pro tip: Figure out which things you can upgrade later.
For example, we knew from our experience in our old house that we could get carpet, light fixtures and hardwood (specifically on our stairs) upgraded cheaper than what the builder was offering.
Some things we did upgrade were things that would be too difficult to get to or touch later like the carpet pad and the trim package.
Step Six. PCC (Pre-Construction Conference)
And then finally we had our PCC or pre-construction conference where we met with our builder and customer care specialist to review our blueprints and sign off on all our selections.
Pro tip: This is a pretty exciting day, so make sure you have all of your questions written down ahead of time. Otherwise you’ll get caught up in the excitement and forget. And if your builder is anything like ours, take pics of your blueprints because they might not let you take them home.
And that was our process! If you have any questions, please feel free to reach out.


